
When creating a blog on Blogger.com, you can start publishing content with just the blogspot subdomain. However, it is recommended to add a custom domain from the beginning to establish yourself as a brand and avoid making redirects in the future.
When you buy a domain from Godaddy.com, they assign an IP address for the domain you purchased. You must then make the changes in these records to point to the Google servers assigned by Blogspot.
And in this guide, we’ll walk on how to set up your custom domain in 3 easy steps.
Table of Content
Step 1: Add a custom domain to blogspot
1. After purchasing your domain from Godaddy, you’ll then go to Blogger dashboard and select the blog in which you want to add a custom domain. After that go to Settings >> click on Custom Domain under Publishing.
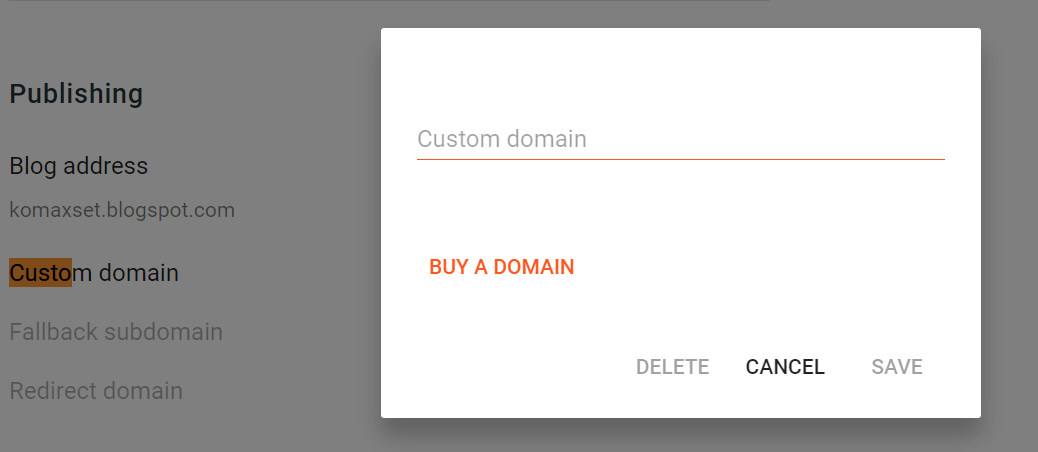
2. Now the custom domain popup will open. Then you can add the domain name you’ve purchased from Godaddy and don’t forget the WWW subdomain, then hit Save.
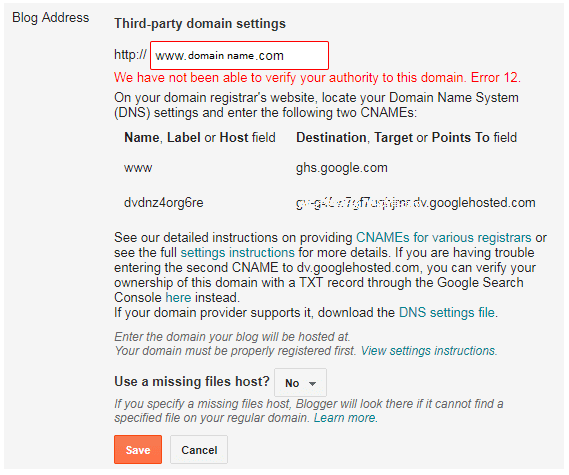
An error will appear with 2 CNAMEs Records. At first, these records will have to be added to the DNS setting on Godaddy’s so DO NOT HIT SAVE just yet.
Note:
Take a screenshot of this window and also copy the whole message to a notepad file and save it in a safe place. You might require it further if you want to switch Blogger to WordPress or if you want to use Cloudflare.
Step 2: Configure ‘CNAME’ records in GoDaddy
3- Log into your Godaddy account >> click ‘ Domains ‘ >> click ‘ All Domains ‘ >> choose your desired domain >> click ‘ Manage.
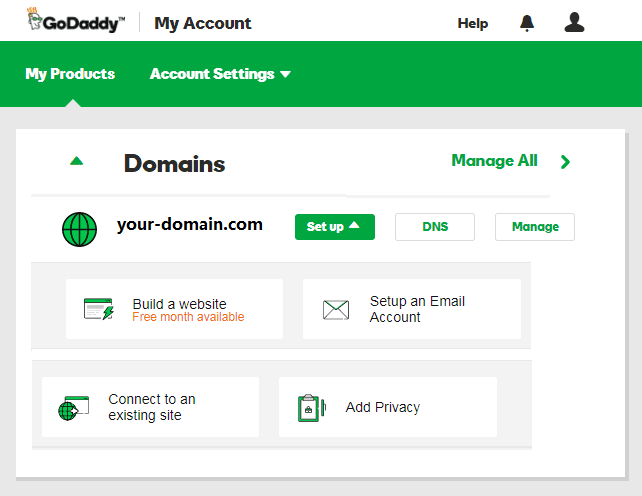
At the bottom of the page, you will see the option to manage DNS >> Click on “Manage DNS“.
4. Then the ” Records ” table will appear on the next page (see below). If the name “www” is already available, you must change it. If not, you must add the new record in step 5.
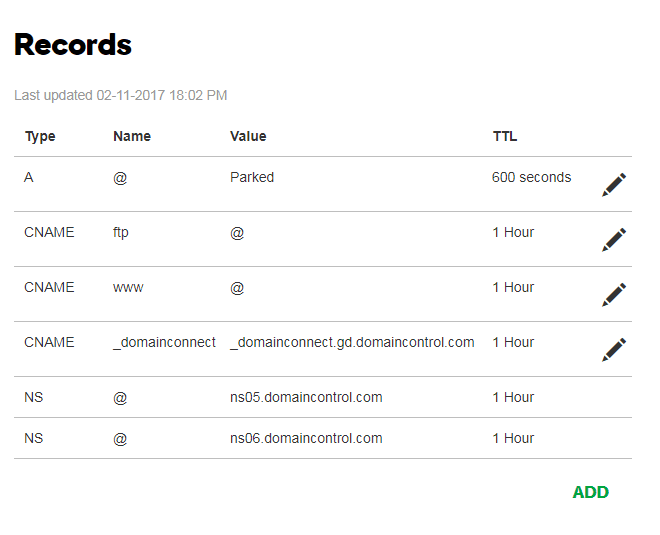
5. Click on ” ADD ” >> In ” Type ” choose ” CNAME ” >> in ” Host ” type ” www ” >> and in “point to” field type ” ghs.google.com ” as shown below.

6. Next, add the other CNAME provided by Blogger. Click on ” ADD ” >> In ” Type ” choose ” CNAME ” >> in ” Host ” type the second CNAME record >> and in the “Points to” field, enter the corresponding address given to you from blogspot.

Step 3: Configure ‘A’ DNS records
After we’ve added 2 CNAMEs records, now we have to add four ‘A’ DNS records provided by the Blogspot server.
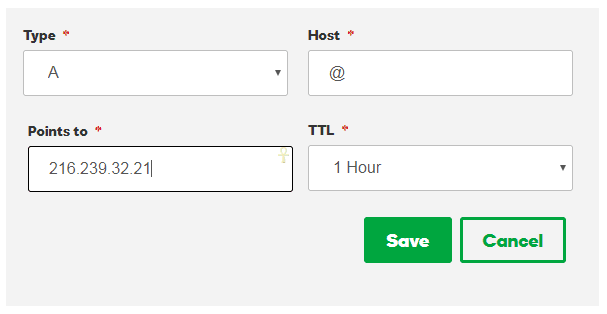
9. Click on ” ADD ” >> In ” Type ” choose ” A ” >> in ” Host ” type ” @ ” >> and in “point to” field type “216.239.32.21”.
216.239.32.21
216.239.34.21
216.239.36.21
216.239.38.21
10. Add the remaining three ‘A’ DNS records just like shown in example #9. The final result would like something like this.

Almost Done!
Once you have completed all 3 steps above, then it’s time to save all the settings and publish the blog.
Make sure you check the option to redirect your “domainname.com” to ” www. Domainname.com”.
Lastly, it’s recommended to enable the SSL provided by Blogger under “HTTPS“. After all, it’s free and tells users that your site is safe to browse.
That’s it,
The DNS settings you have added (A & CNAME records) may take some time to process. Now you have to wait 1-4 hours for these changes to take effect.
If you are facing any kind of problems in setting up a Godaddy custom domain with Blogger, then tell us your issue in the comment section below
